Introduction
Post-construction cleaning is a critical phase in the construction process. It ensures that the newly constructed space is safe, clean, and ready for occupancy. This comprehensive post-construction cleaning checklist will guide you through each step, ensuring no detail is overlooked. Whether you are a contractor, property owner, or cleaning professional, this detailed guide will help you achieve the highest standards of cleanliness and safety.
1. Initial Assessment and Preparation
1.1 Assess the Area
Before beginning any cleaning, conduct a thorough assessment of the area. Identify all the surfaces, fixtures, and materials that need to be cleaned. Take note of any sensitive materials that may require special handling or cleaning methods.
1.2 Gather Necessary Supplies
Ensure you have all the necessary cleaning supplies and equipment. This includes:
- Heavy-duty trash bags
- Commercial-grade vacuum cleaners
- Microfiber cloths
- Dust masks and protective gloves
- Cleaning solutions for different surfaces (e.g., glass cleaner, floor cleaner, all-purpose cleaner)
- Mops, buckets, and brooms
1.3 Safety Precautions
Adhere to safety guidelines to protect yourself and your team. Wear appropriate personal protective equipment (PPE) such as gloves, masks, and safety glasses. Ensure proper ventilation in the workspace to avoid inhaling dust and fumes.
2. Rough Cleaning Phase
2.1 Debris Removal
Begin by removing all large debris and construction materials. This includes wood scraps, metal pieces, and packaging materials. Use heavy-duty trash bags or a dumpster for disposal. This step is crucial for clearing the space and making it more manageable for detailed cleaning.
2.2 Dust and Vacuum
Dust and vacuum all surfaces thoroughly. Pay special attention to high surfaces such as ceilings, light fixtures, and air vents. Use a commercial-grade vacuum with a HEPA filter to capture fine dust particles. Dusting should be done systematically, starting from the top and working downwards to prevent redistributing dust onto already cleaned surfaces.
2.3 Window and Glass Cleaning
Clean all windows and glass surfaces using a glass cleaner and a microfiber cloth. Ensure streak-free results by using a squeegee. Don’t forget to clean the window frames and tracks. This step not only improves the aesthetics of the space but also enhances natural light and visibility.
3. Detailed Cleaning Phase
3.1 Walls and Baseboards
Wipe down all walls and baseboards with a damp cloth. Remove any marks, smudges, or adhesive residues. For painted surfaces, use a mild detergent to avoid damaging the paint. Pay attention to corners and edges where dust tends to accumulate.
3.2 Floor Cleaning
Clean all floor surfaces according to their specific material requirements:
- Hardwood Floors: Use a hardwood floor cleaner and a damp mop. Avoid excessive water as it can damage the wood.
- Tile Floors: Scrub with a tile cleaner and a stiff brush, focusing on grout lines where dirt can build up.
- Carpeted Floors: Vacuum thoroughly and consider professional carpet cleaning for deep stains. For best results, use a carpet extractor to remove embedded dirt and dust.
3.3 Fixture and Fitting Cleaning
Clean all fixtures and fittings, including light switches, door handles, and vents. Use disinfectant wipes to ensure they are sanitized. Pay special attention to high-touch areas that are prone to germs and bacteria.
4. Final Touches
4.1 Bathroom and Kitchen Cleaning
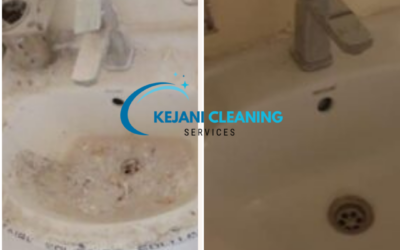
Thoroughly clean all bathroom and kitchen areas. This includes sinks, countertops, cabinets, and appliances. Use appropriate cleaners for each surface type. Ensure that all surfaces are not only clean but also disinfected to maintain hygiene standards.
4.2 Polishing and Shining
Polish all metal surfaces such as faucets and door handles. Clean mirrors and other reflective surfaces to ensure they are streak-free and gleaming. Polishing not only enhances the appearance but also protects the surfaces from tarnish and wear.
4.3 Final Dusting and Vacuuming
Conduct a final round of dusting and vacuuming to capture any remaining dust or debris. Pay attention to corners, edges, and other hard-to-reach areas. This step ensures a pristine finish and leaves the space looking immaculate.
5. Inspection and Approval
5.1 Conduct a Final Inspection
Walk through the cleaned area and conduct a final inspection. Ensure all surfaces are spotless and free of debris. Check for any areas that may have been missed or need additional attention. This thorough inspection guarantees that the cleaning meets the highest standards.
5.2 Client Walkthrough
If you are a contractor or cleaning service, conduct a walkthrough with the client. Address any concerns they may have and make any necessary adjustments. This step is crucial for client satisfaction and ensures that all their expectations are met.
5.3 Obtain Approval
Obtain final approval from the client or project manager. Ensure they are satisfied with the cleanliness and condition of the space. A signed approval form can serve as a record of the completed work and client satisfaction.
6. Post-Cleaning Maintenance Tips
6.1 Regular Cleaning Schedule
Establish a regular cleaning schedule to maintain the cleanliness of the space. Regular maintenance will prevent the buildup of dust and dirt. A well-maintained space not only looks better but also provides a healthier environment for its occupants.
6.2 Air Quality Management
Use air purifiers to maintain good air quality in the newly cleaned space. Regularly change HVAC filters to prevent dust accumulation. Good air quality is essential for the health and comfort of the occupants.
6.3 Proper Waste Disposal
Ensure proper disposal of cleaning materials and waste. Follow local regulations for disposing of hazardous materials. Proper waste management is crucial for environmental sustainability and compliance with local laws.
Conclusion
Post-construction cleaning is a meticulous process that requires attention to detail and a systematic approach. By following this comprehensive checklist, you can ensure that your newly constructed space is clean, safe, and ready for occupancy. A well-executed post-construction cleaning not only enhances the appearance of the space but also ensures the health and safety of its occupants


Thank you for providing such valuable information.